audiolab
assets for the IDM audio lab (2MTC, room 824)
This project is maintained by IDMNYU
The IDM Synthesizers
- Overview
- Studio Basics
- Glossary
- The Synthesizers
- Audio-Lab-to-go
Overview

IDM has a collection of (mostly analog) synthesizers for the users of the Audio Lab to work with, set up as a self-contained studio of modular synthesizers along one side of the room, with a second set of non-modular synthesizers on the center table. The lab has two main types of analog modular synthesizers, based on the 1970s-era designs of Serge Tcherepnin (Serge) in California and Alan Robert Pearlman (ARP) in Massachusetts, as well as a small collection of non-modular synthesizers, including a rack of industry standard digital synthesizer equipment from the late 1980s. The various systems are described in these pages. Our collection includes:
- a large (7-panel) Serge modular system built for IDM by Patch Point in Berlin, using PCBs designed by Random*Source based on the “4th Generation” Serge systems from 1979-1980, as well as two modules based on signal processors designed by Jürgen Haible.
- a smaller (2-panel) Serge modular system built by Luther Bradfute in Tennessee based on the ‘Homebuilt’ panels from the 73-75 project by Jon Nensén (The Human Comparator) in Stockholm. This synthesizer uses the designs from the original 1973 Serge modular systems developed by Tcherepnin at CalArts.
- a second 2-panel 73-75 system built by Matt Gerken in Ohio, consisting of a ‘Voice’ and ‘Control’ panel; like the ‘Homebuilt’, these panels are based on Tcherepnin’s first-generation designs.
- a third 73-75 ‘Preset’ panel built in the lab, based on Tcherepnin’s early designs.
- two panels of modules by noted synthesizer designer Ian Fritz, produced in Serge-compatible format by Paul Akin at Uglysound Electronics.
- a Red Control panel built by Rex Probe / Sound Transform Systems in the late 1990s, based on 1979-era Serge designs.
- two Serge-format panels based on Ken Stone’s CGS modules: a Black Swamp panel designed by Jon Peters, based on the CGS SWAMP, built by Charlie Kerr at Loudest Warning; and a 16-stage CGS Programmer Sequencer designed and built by Finlay Shakespeare at Future Sound Systems.
- a Benyahon Percussion Syhnthesizer panel, including designs by Peter Blasser, also designed and built by Finlay Shakespeare.
- the Shelfisizer, several panels of Arduino-based Serge-compatible modules designed and built by Luke.
- a Benjolin synthesizer designed by Rob Hordijk, built in Serge format by Grant Wilkinson.
- a Meta sequencer / synthesizer in Serge format, designed by Jon Nensén and built by Luke.
- a Variable Force Generator Serge-format CV/Gate controller and a 4UMatrix Mixer, both built by Logan Erickson / Low-Gain Electronics.
- two Ciat-Lonbarde instruments designed by Peter Blasser and built at Patch Point: a Plumbutter 2 and a Textrax.
- a Destiny 16 Psyche modular synthesizer, built in the UK.
- a Fénix II PP modular synthesizer, designed and built by Patch Point as a recreation of the Synton Fénix II synthesizer.
- a Vermona DRM1 MKIII analog drum synthesizer, with a custom patchbay built by Luke to interface with the Serge system.
- a TTSH, an open-source reimagining of the 1971 ARP 2600, designed by The Human Comparator and custom-built for Luke by Patch Point.
- an open source design of an ARP 1601 Sequencer, also built by Patch Point.
- a Moog Werkstatt-01 monophonic analog synthesizer.
- a Bastl Instruments Rumburack 2.0 hybrid analog-digital modular synthesizer.
- a Noon passive analog instrument developed by Eric Pitra (Landscape FM).
- a “GateBox” aleatoric triggering system designed by Luke.
- a 1977 ARP Avatar.
- a 1975 Roland System 100.
- a 1969 EMS VCS-3, currently under restoration.
- an Etherwave Plus, a modern kit Theremin developed by Moog Music.
- a Prophet-6 Desktop 6-voice analog synthesizer, developed by Sequential as a modern reissue of their famed Prophet-5 synthesizer from 1978.
- a Deckard’s Dream 8-voice analog synthesizer, developed by the Black Corporation as a modern reimagining of the Yamaha CS-80 synthesizer from 1977.
- an イセーニン (“Ise-Nin”) 8-voice analog synthesizer, developed by the Black Corporation as a modern reimagining of the Roland Jupiter 8 synthesizer from 1981.
- a Roland SH-101 monophonic analog synthesizer from 1982.
- a Yamaha TX81Z FM Synthesizer from 1987.
- A Roland D-550 “Linear Arithmetic” synthesizer, the rackmount version of the Roland D-50, from 1987.
- A Korg M1R sample-based synthesizer, the rackmount version of the Korg M1, from 1988.
- A Roland R-8M drum synthesizer, a rackmount version of the Roland R-8 from 1989.
- A Yamaha TX816 with 8 TF1 (rackmount DX7) modules, from 1984.
- A Roland HS-60 consumer version of the Juno-106, from 1985.
- A Realistic Concertmate MG-1, a consumer Moog synthesizer marketed by Radio Shack in 1981, under restoration.
In addition, some auxiliary equipment exists in the Audio Lab to help people work with the synthesizers:
- A Tascam Model 24 Mixer with USB output and SD card recording, for the Serge and ARP synthesizers.
- A Tascam Model 24 Mixer with USB output for recording, for the synthesizers on the center table.
- An Akai GX-4000DB reel-to-reel tape recorder.
- A MOTU 8A DC-coupled Audio Interface with a custom-built banana-jack patchbay.
- A MOTU Micro Express MIDI interface.
- An iConnectivity mioXL MIDI interface.
- A vintage IVL Pitchrider 4000 pitch-to-MIDI converter.
- a Roland GI-10 Guitar-to-MIDI Interface.
- Several Arturia KeyStep MIDI keyboard controllers.
- An Akai MPK-225 MIDI keyboard controller.
- A Korg Keystage MIDI 2.0 keyboard controller.
- Two CV.OCD MIDI-to-Control Voltage converters, as well as a Gate Boost module.
- Multiple Low-Gain Electronics passive converter boxes.
- Three vintage B&K oscilloscopes - two model 1470s, one model 1479B.
- One Rigol digital four-channel oscilloscope.
- Two sets of stereo Genelec speakers, one with a subwoofer.
Studio Basics
First, please remember to read the IDM Audio Lab Policies, Rules, and Room Reservation Procedure.
Power
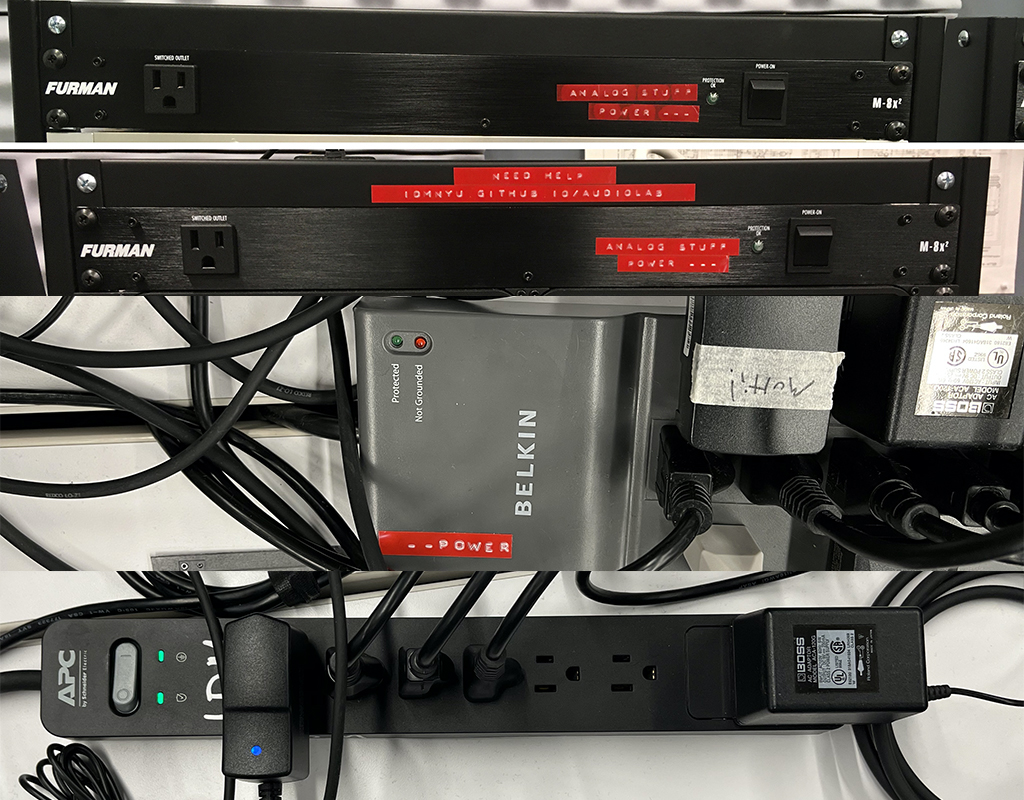
The power for nearly everything related to the synthesizers in the Audio Lab is controlled by FIVE switches; two found on the Furman power conditioners under the main mixing board along the wall, a third Furman power conditioner to left of the room when you’re facing that mixer, and the switches on the two power strips on the center table:

Green lights on the conditioners and power strips will confirm that you’ve got power. Please use these power switches (and nothing else) to turn on and off the synthesizer equipment in the Audio Lab.
Mixers
There are two mixers for the analog equipment; one along the wall for the modular synthesizers, and another on the center table.
Modular Synth Mixer
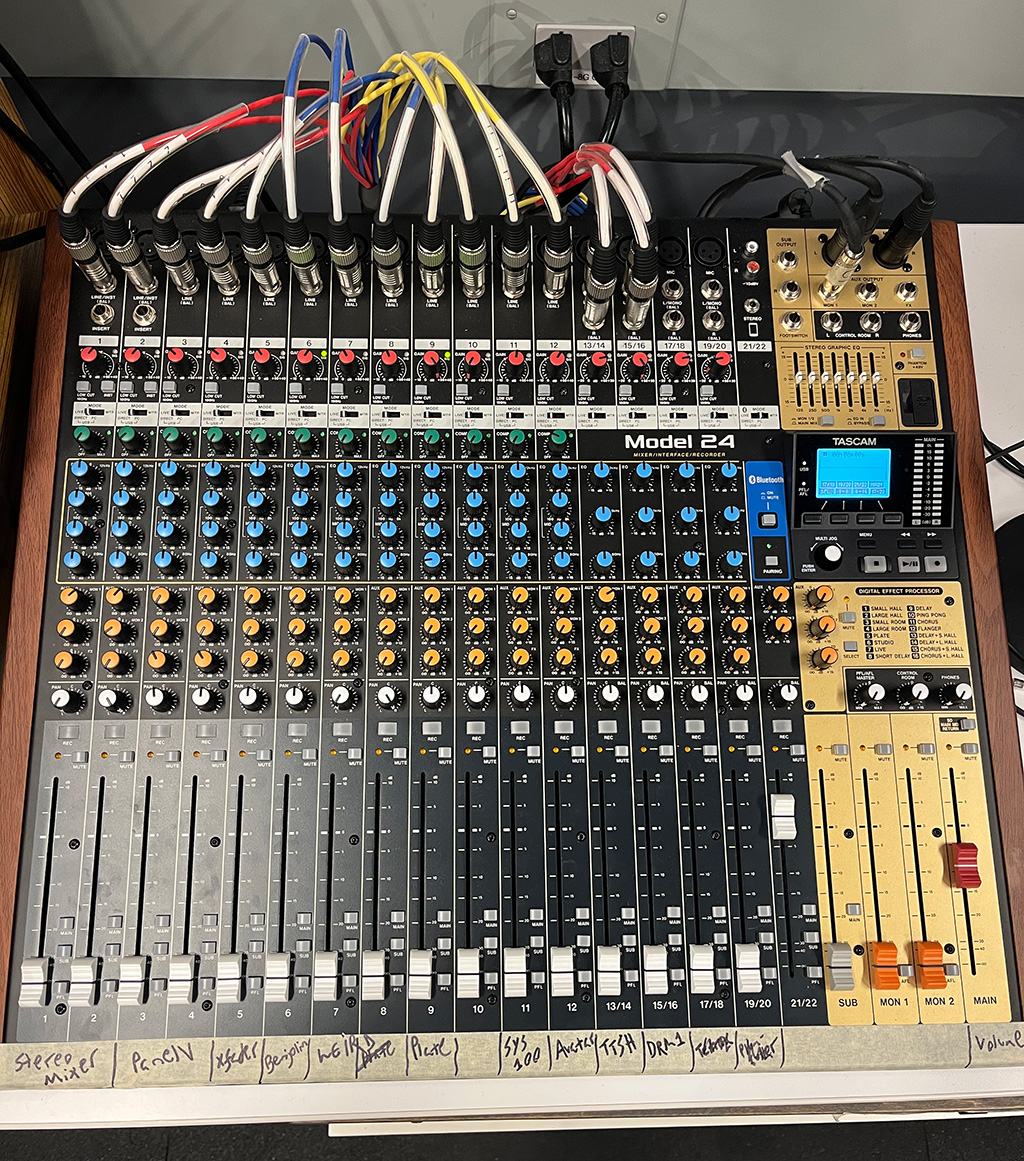
The mixer for the modular synthesizers is a Tascam Model 24, which takes inputs from the various modular synthesizers and feeds them to the speakers or, by using a USB connector, to your computer for recording. The Tascam mixer also has an SD card input that allows you to directly record digital files from the mixer.

The channels of the mixer are wired to:
| Channel | Input |
|---|---|
| 1 | the left output of the “Stereo Mixer” module on Panel 1 of the R*S Serge. |
| 2 | the right output of the “Stereo Mixer” module on Panel 1 of the R*S Serge. |
| 3 | the left output of the “Stereo Mixer” module on Panel 5 of the R*S Serge. |
| 4 | the right output of the “Stereo Mixer” module on Panel 5 of the R*S Serge. |
| 5 | the output of the “XFader” module on Panel 3 of the R*S Serge. |
| 6 | the main output of the Benjolin. |
| 7 | the left output of the “weird” submixer on the left of the room. |
| 8 | the left output of the “weird” submixer on the left of the room. |
| 9 | the output of the IKEA plate reverb. |
| 10 | nothing. for now. |
| 11 | the output of the Roland System 100. |
| 12 | the output of the ARP Avatar. |
| 13/14 | the left and right output of the TTSH Mixer section. |
| 15/16 | the stereo output of the Vermona DRM1 drum synthesizer. |
| 17/18 | nothing. for now. |
| 19/20 | nothing. for now. |
| 21/22 | good channels to use for Bluetooth audio from a laptop or DAW playback. |
Please don’t re-plug the channels on the mixer.
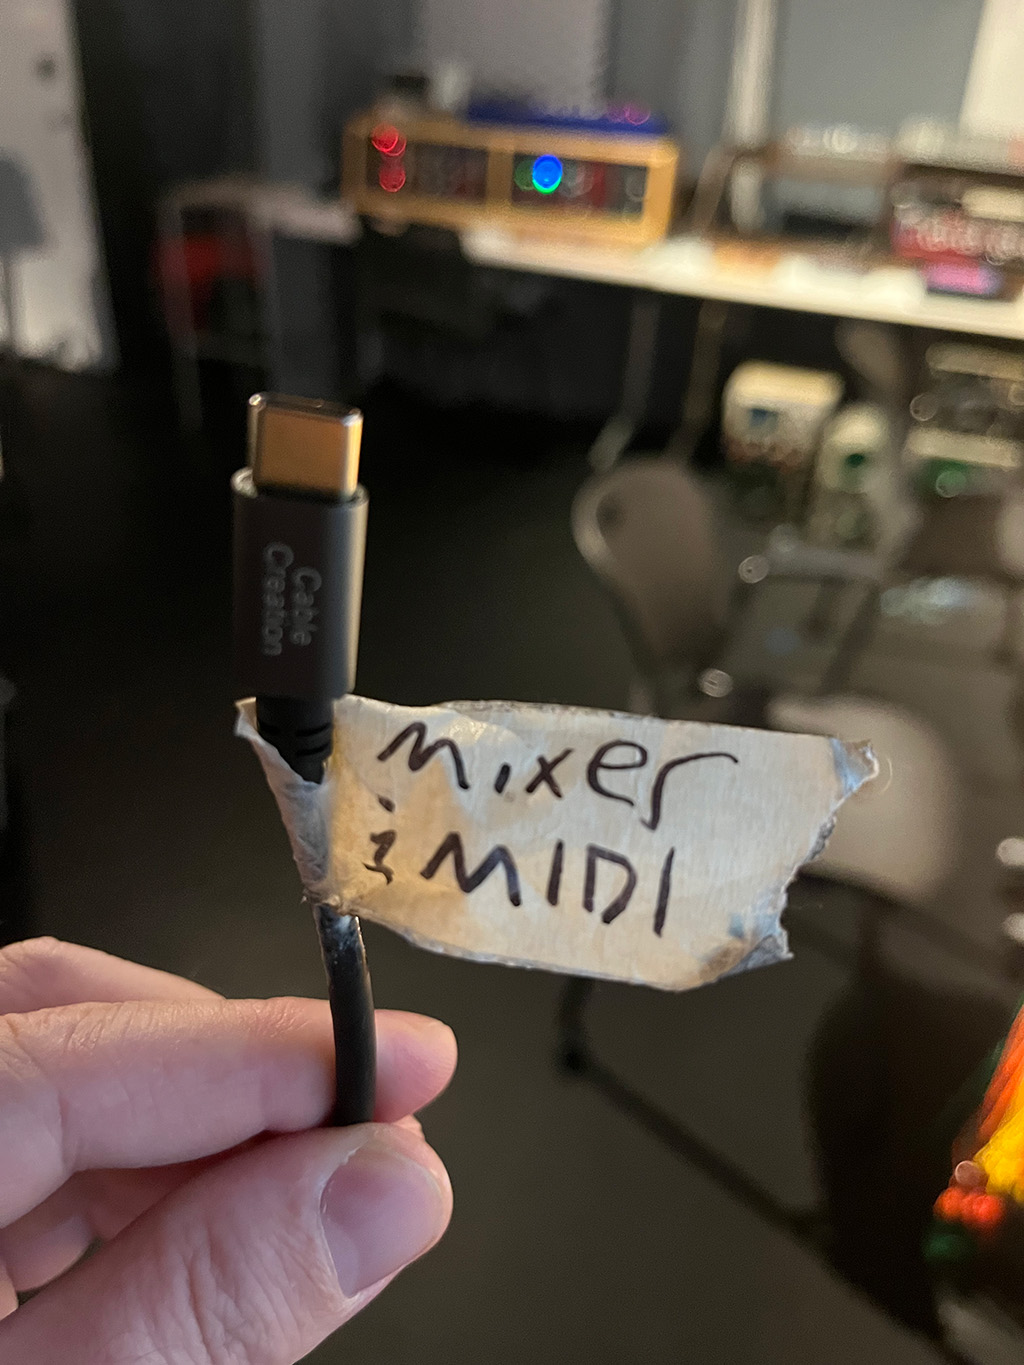
The USB output of the mixer comes out of a USB hub under the patchbay and mixer. This hub also allows you to connect to the MOTU 8A audio interface and the MOTU Micro Express MIDI Interface. The USB cable out of the hub is dangling by the mixer and labelled:

The mixer is a multi-channel audio interface, with the Main Mix available as input channels 23/24. In other words, you can record individual tracks from the mixer on a per-channel basis. If you are a Mac user, you won’t need a driver for the mixer, though you should confirm that you have a connection by looking in the “Audio MIDI Setup” or “Sound” panel under your System Preferences. If you are using a Windows machine, you will have to download and install a driver for the mixer here.
You can also record to an micro-SD card on the mixer directly by record-enabling individual channels and using the console interface above the output section of the mixer. The mixer will record standard .WAV files at 24-bit, 44.1kHz. Higher sampling rates can be achieved by recording onto your computer via USB.
The “Main” output of the mixer routes the audio to the two Genelec audio speakers on the table, based on the volume of the white “CR” (Control Room) fader. They should let you listen to the synths with plenty of volume, so please don’t adjust the gain controls on the Genelecs. The “Sub” output allows you to route audio from the mixer to the Akai reel-to-reel tape deck. The “Sub” output is a bus, so you need to enable it on a per channel basis via the small buttons next to the channel fader.
Center Table Mixer
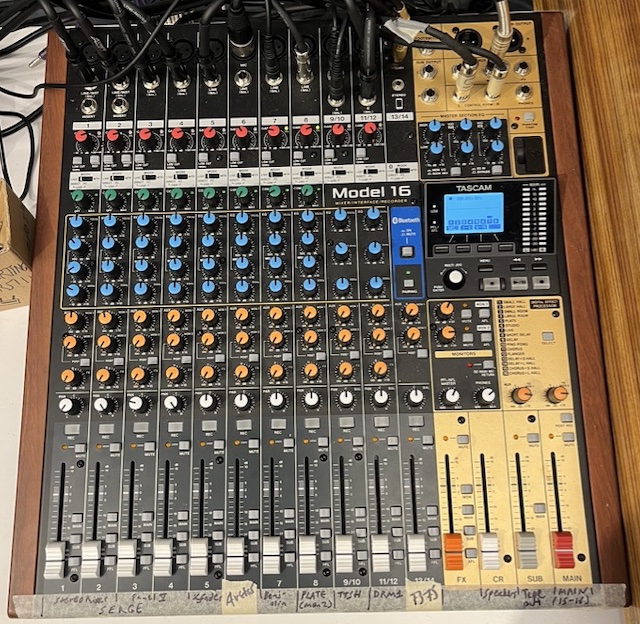
The mixer on the center table (for the non-modular synths) is a Tascam Model 16, which takes inputs from the various keyboard synthesizers and feeds them to the speakers or, by using a USB connector, to your computer for recording.

The channels of the mixer are wired to:
| Channel | Input |
|---|---|
| 1 | the output of the Deckard’s Dream synthesizer. |
| 2 | the output of the SH-101 synthesizer. |
| 3/4 | the left and right outputs of the ISE-NIN synthesizer. |
| 5/6 | dead channels. |
| 7/8 | the left and right outputs of the Prophet-6 synthesizer. |
| 9/10 | the stereo output of the 80s rack. |
| 11/12 | a stereo 3.5mm / 1/8” * jack for a laptop connection. |
| 13/14 | good channels to use for Bluetooth audio from a laptop or DAW playback. |
* Audio connector trivia: mini-phone jacks have a diameter of 3.5mm, which is 0.14in, not 0.125in (1/8”). In the USA, they are incorrectly referred to as 1/8” jacks because (a) the USA has a cultural aversion to the metric system and (b) they look to be about half the size of 1/4” jacks.
Please don’t re-plug the channels on the mixer.
The Vocoder is hard-wired using the insert output of the microphone channel and the headphone output of the Prophet-6.
The USB output of the mixer has a cable connected for your use. If you connect it up to your computer, you can record the output of the equipment. The mixer shows up as a multi-channel audio interface, with the input channels on the mixer routed on a per-channel basis (e.g. input channel 3 on the mixer comes into your computer as input channel 3 of the interface). The “Main Mix” output of the mixer appears on channels 15-16.
If you are a Mac user, you won’t need a driver for the mixer, though you should confirm that you have a connection by looking in the “Audio MIDI Setup” or “Sound” panel under your System Preferences. If you are using a Windows machine, you will have to download and install a driver for the mixer here.
The mixer can send your computer audio either pre- or post-fader (which includes not only the channel level, but also the internal effects and equalization). The red button at the top of the channel below the white Gain knob lets you set this option. In general, the pre-fader (button up) option will give you a cleaner signal, allowing you to post-process the audio once you’ve recorded it.
The “Main Mix” of the mixer routes the audio to the two Genelec audio speakers on the table. They should let you listen to the synths with plenty of volume, so please don’t adjust the gain controls on the Genelecs.
MIDI
The synthesizers around the perimeter of the room can be controlled by MIDI either directly or through cv.ocd MIDI to control voltage converters made by Sixty-Four Pixels:

There are two cv.ocd converters in the IDM Audio Lab - a white one (with a gate booster) seated in between the TTSH and the 1601 Sequencer, and a black one over with the Serge synthesizers. The white one is pre-wired to all the “East Coast” synthesizers in the studio on the right side of the perimiter. The black one is unconnected and can be patched to Serge equipment using the Low Gain converter box next to it.
The cv.ocd boxes have sixteen control voltage outputs arranged as follows:
| Output Jack | MIDI Message | Voltage |
|---|---|---|
| A, B, C, D | Note On Channel 1, 2, 3, 4 | Pitch (1V/Octave) |
| 1, 2, 3, 4 | Note On Channel 1, 2, 3, 4 | Trigger (5V pulse) |
| 5, 6, 7, 8 | Note On/Off Channel 1, 2, 3, 4 | Gate (5V HIGH, 0V LOW) |
| 9, 10, 11, 12 | Clock Tick quarter, 8th, 16th, 32nd note | Trigger (5V pulse) |
The MOTU Micro Express MIDI interface in the rack below the main (Tascam Model 24) mixer is connected to the same USB cable. You can talk to the different devices using Max/MSP, Ableton, or other software with the following port list:
| Output Port | Channel | Input |
|---|---|---|
| 2 | 1 | white cv.ocd - wired to the TTSH |
| 2 | 2 | white cv.ocd - wired to the Oberheim SEM |
| 2 | 3 | white cv.ocd - wired to the ARP Avatar |
| 2 | 4 | white cv.ocd - wired to the Roland 100 series |
| 3 | 1-4 | black cv.ocd by the Serge synthesizers |
| 4 | 1 | wired to the MIDI input on the Vermona drum synthesizer |
The Deckard’s Dream, ISE-NIN, and Prophet 6 around the center table have MIDI keyboards directly attached to them; the 80’s rack has an iConnectivity MioXL rackmount MIDI interface that can be connected to your computer with a USB cable. The following is the port list:
| Output Port | Channel | Input |
|---|---|---|
| 1 | 1 | TX81Z |
| 2 | 1 | Roland D-550 |
| 3 | 1 | Korg M1R |
| 4 | 1-8 | TX816 (8 channels) |
| 5 | 10 | Roland R-8M |