Loading the Pixel Array of an Image
In this tutorial we will explain one way to set up your code to animate images. Although the idea behind Image Animation is fairly the same as descripbed in our Basic Setup, there are a few concepts that are important to have in mind prior to animating images. The following tutorial is by no means the ultimate way of doing Image Animation, but it is a simple way that allows you to fully inderstand the logic behind it. Here, we will discuss:
- loadPixels() vs. img.loadPixels()
- Source and Destination Images
- Image Array
- For Loops
- Pixel Neighborhood
- Copying
- Flipping
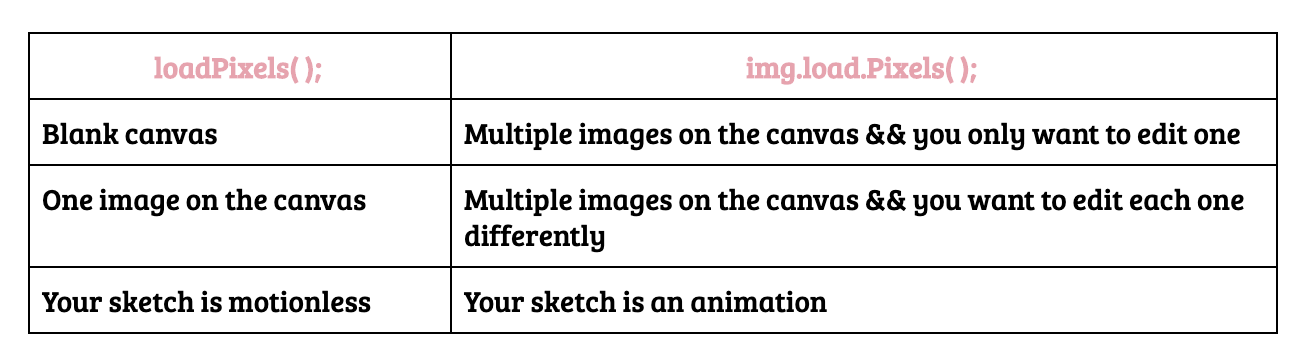
loadPixels() vs. img.loadPixels()
To summarize, we use img.loadPixels() when you want to manipulate pixels regardless if they are being displayed on the canvas or not. If you use loadPixels, you can only manipulate what is already displayed on your screen.
Source and Destination Images
We previously mentioned you should use img.loadPixels() when creating an animation. The reason why you should do that is because an animation is a sequence of images. To process those images and manipulate them, you need to display one while you alter the other. In order to accomplish that, you will need two images: a source and a destination.
- The source image is the one we upload.
- The destination image is the one we create based on the one we uploaded.
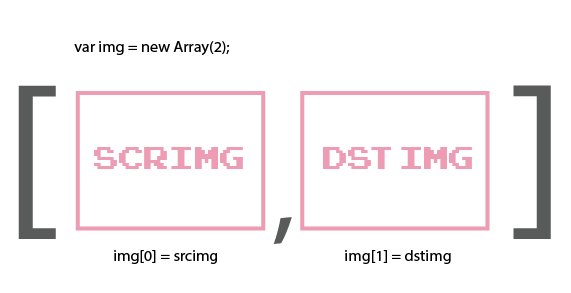
Image Array
In order to animate your image, you need to display one while you manipulate the other. To accomplish that in code, we need an array that holds two images (the source and the destination).
At first, we are displaying the source and manipulating the destination.
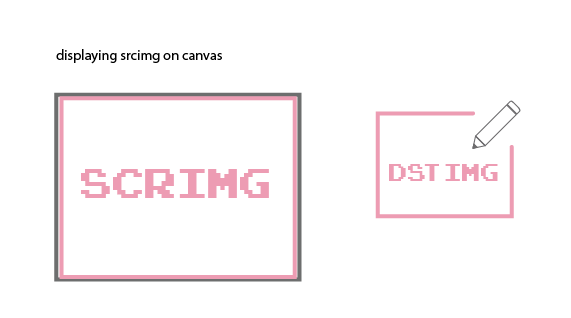
Once we are done manipulating the destination image, we will then display it and start manipulating the source.

In an animation, what we are really doing is displaying different frames. To animate an image using code, we don't need thousands of frames. All we need is two images and we can flip between the two of them.
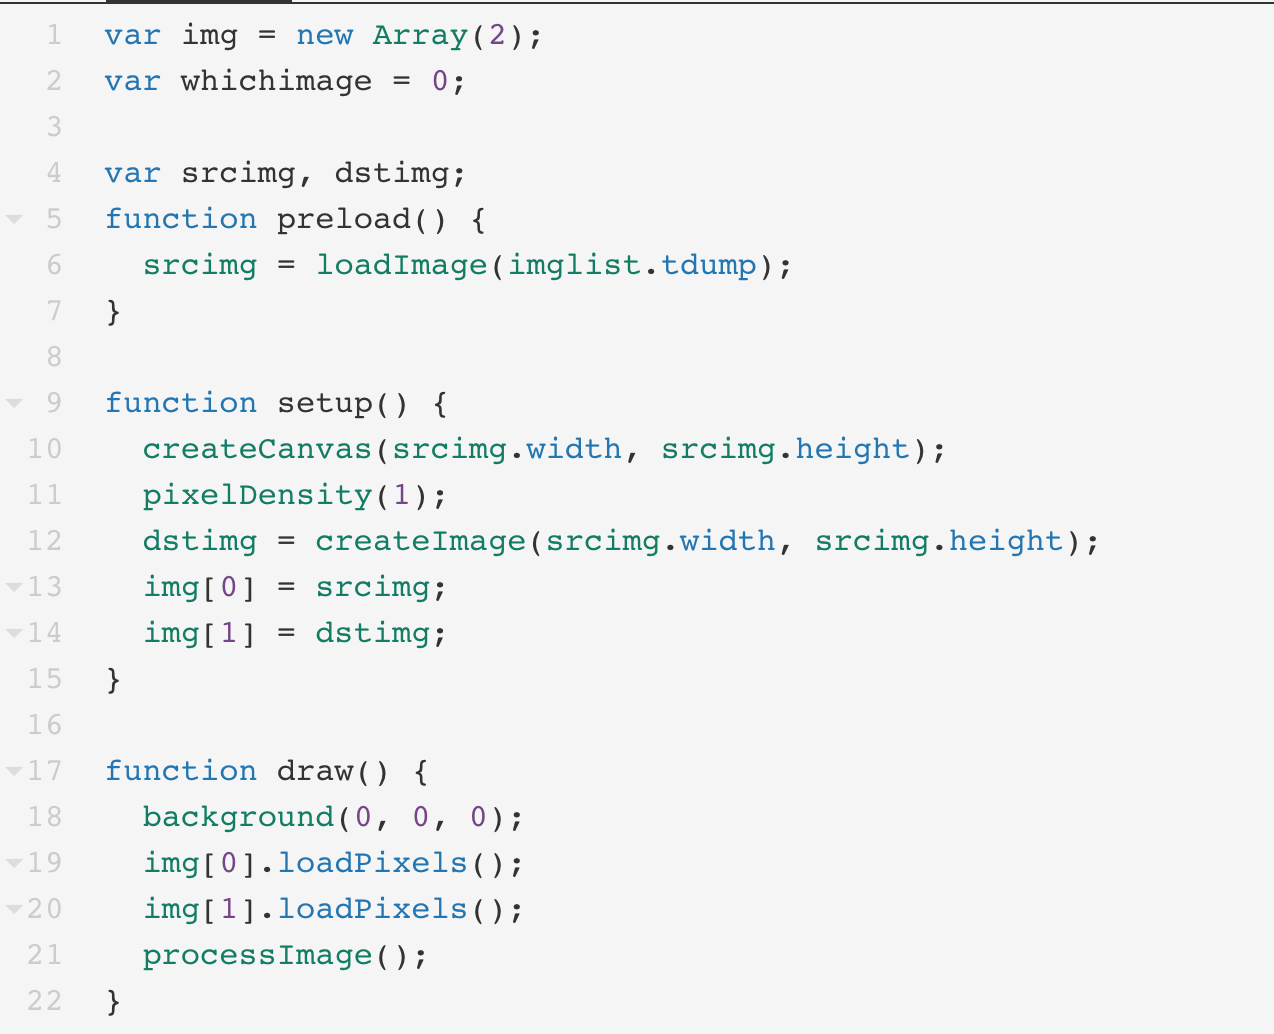
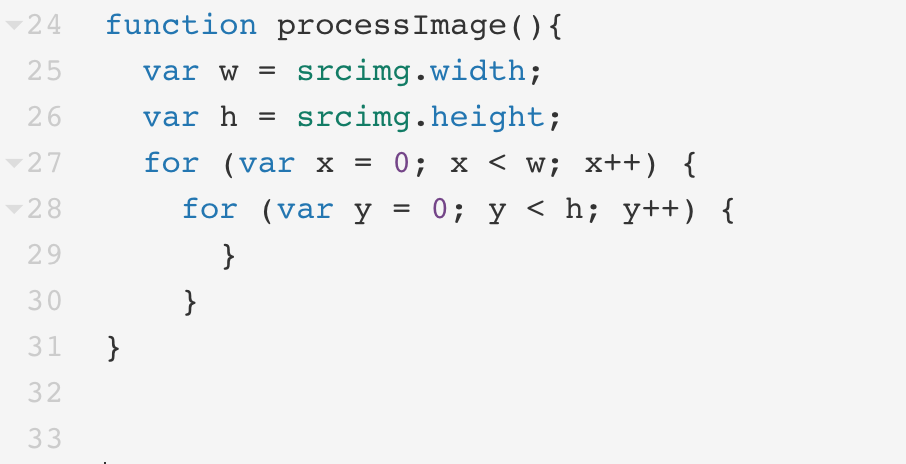
For Loops
Our double for loop is the same as in our basic set up! The only difference is that instead of going through the width and height of the entire canvas, we are going through the width and height of our source image. In order to make your code clearer, let's put everything related to animating images in a separate function. Here, we call this function processImage()
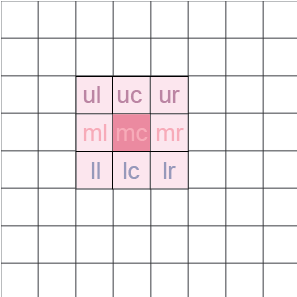
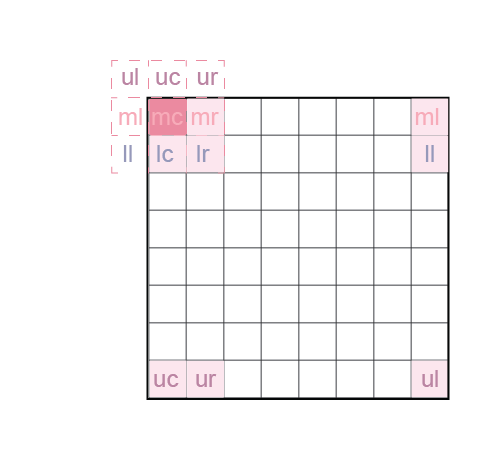
Pixel Neighborhood
To animate our image, we will need to move certain pixels. Since our pixel array is a flat array of RGB values, we will need to alter our index variable. We will still need to keep track of the red value of each pixel like we did before, since it marks the beginning of a new pixel. However, it might come in handy to keep track of all of it's neightbors. That means we will need 9 variables:
- upper center (uc)
- upper left (ul)
- upper right (ur)
- middle center (mc) *current pixel
- middle left (ml)
- middle right (mr)
- lower center (lc)
- lower left (lf)
- lower right (lr)

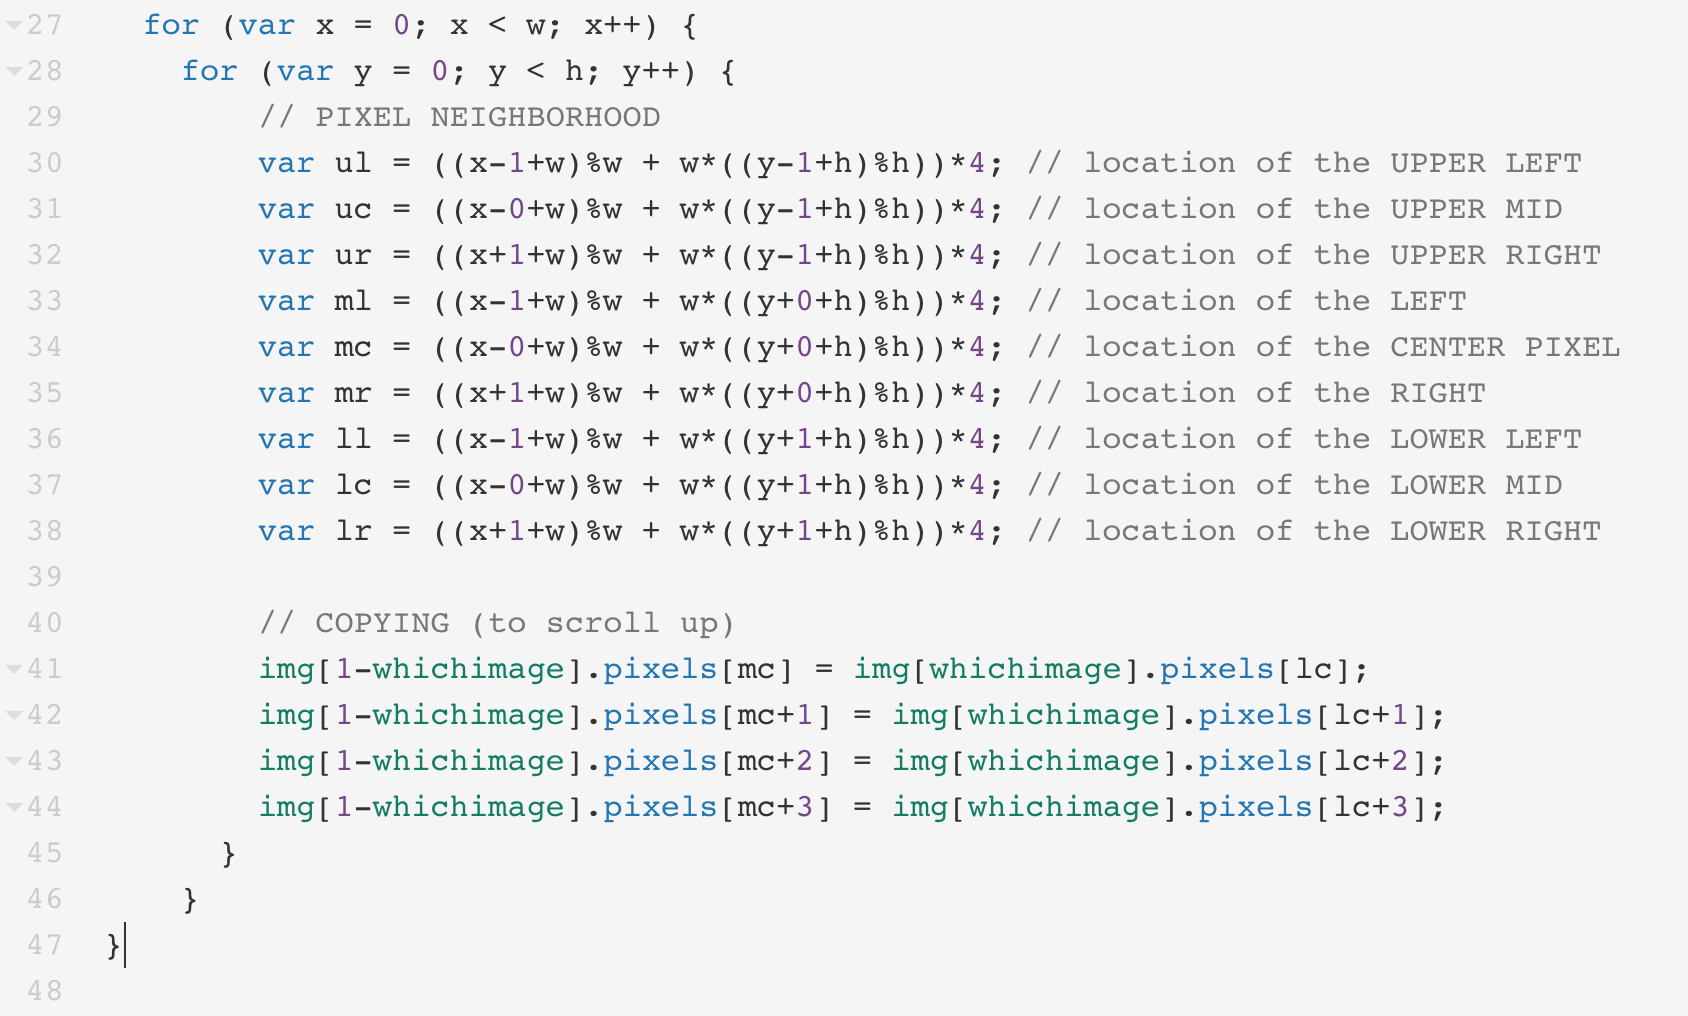
Here are the formulas to get the index of each neighbor:
- var uc = ((x-0+w)%w + w*((y-1+h)%h))*4;
- var ul = ((x-1+w)%w + w*((y-1+h)%h))*4;
- var ur = ((x+1+w)%w + w*((y-1+h)%h))*4;
- var mc = ((x-0+w)%w + w*((y+0+h)%h))*4;
- var ml = ((x-1+w)%w + w*((y+0+h)%h))*4;
- var mr = ((x+1+w)%w + w*((y+0+h)%h))*4;
- var lc = ((x-0+w)%w + w*((y+1+h)%h))*4;
- var ll = ((x-1+w)%w + w*((y+1+h)%h))*4;
- var lr = ((x+1+w)%w + w*((y+1+h)%h))*4;
These formulas might look scary, but they are not that difficult to grasp once you look at them in sections. The first thing we have to pay attention to is the position of the neighbor regarding its x and y values.
- If you want to access the left neighbor of a pixel, for example, you know that it’s y position is the same, and it’s x position is the x of the center pixel - 1.
- If you want to access the lower neighbor of a pixel, you know that it’s x position is the same, and it’s y position is the y of the center pixel + 1.
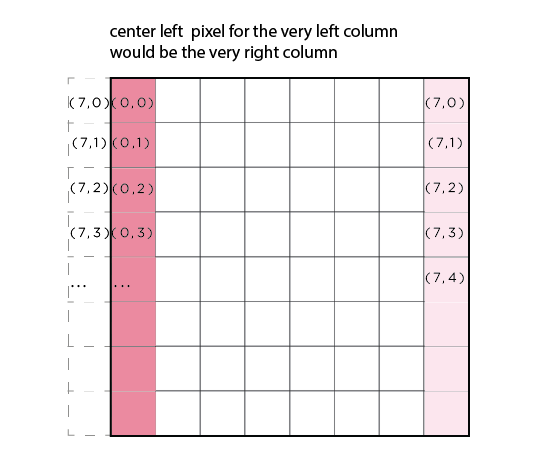
If the center pixel is at the edge, simply plus or minus one from its x,y coordinate might get a number that is out of index. For instance, if x,y coordinate is 0,0, when we getting the center left pixel we will use -1,0, and it turns to index -4 (out of range). To prevent this happen, we define neighbors for pixels that are on the edge in a different way.
To access the left neighbor, we will need the ( x position relative to the center pixel + width) % width. This formula works because if the pixel is not at the edge, the remainder will be the number itself, not affecting the result at all. However, if the x position is higher than the width, it will prevent the number from getting out of range. Following the same logic, to access the upper neighbor, we will need the ( y position relative to the center pixel + height) % height.
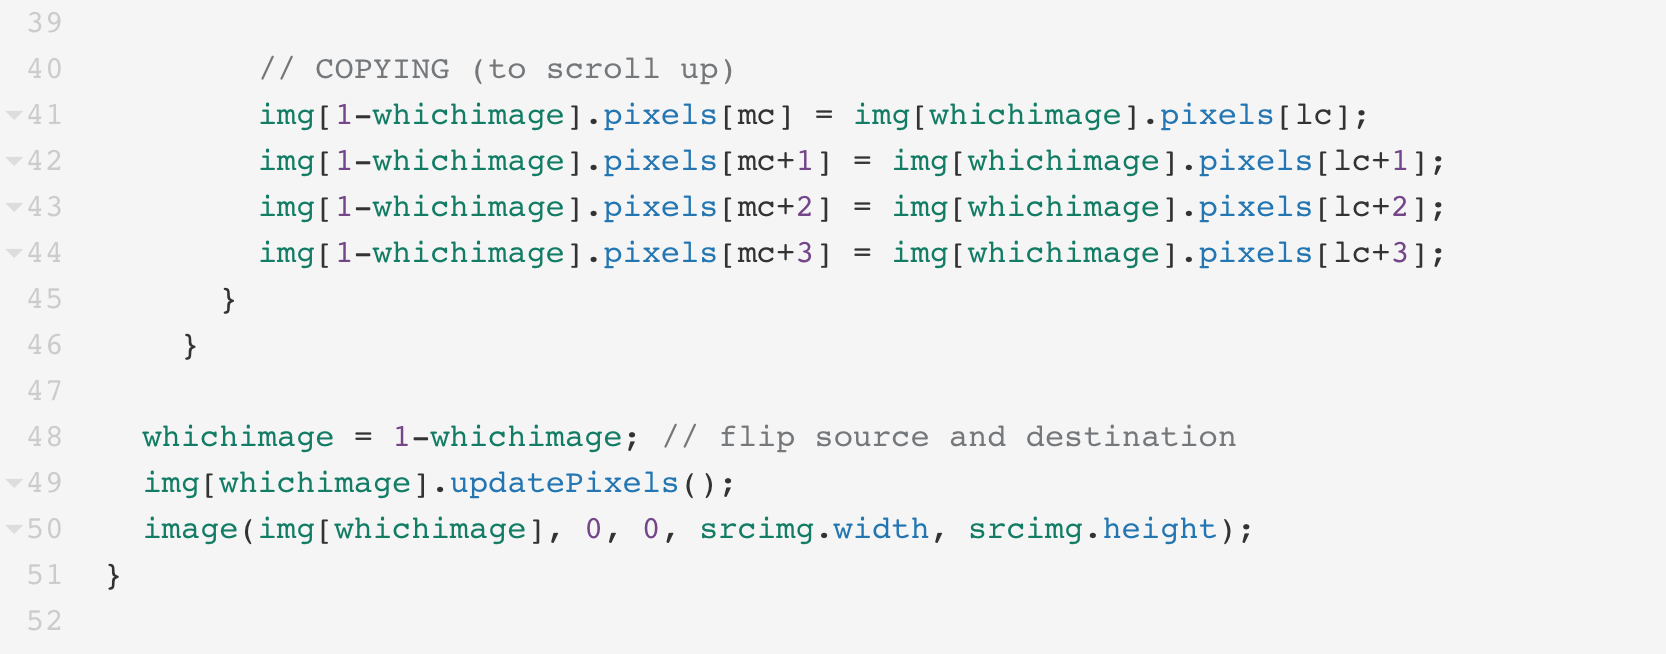
Copying
The process of manipulating each pixel is similar to the process we use to manipulate each rgb value, except that instead of simply saying that:
pixels [ index + 0 ] = a number
We need to copy pixels from the image we are displaying to the one we are manipulating. That means we need to do:
dstimg.pixels [ mc ] == src.pixels[ mc ]
To generate motion, we cannot copy the pixel at the same position. If we want to scroll up, for example, we copy into the destination image the pixel below on the source image.
Flipping
After we have made the changes which will cause the image to be animated, we can then flip the image we are manipulating with the one we are displaying and let our for loop to that repeatedly.